Showing posts with label lifelike. Show all posts

Tuesday, November 15, 2011

Cuddly Baby Dolls by Mary Golightly - Now on eBay


A baby is sunshine and
moonbeams and more.
Brightening your world
as never before.
~Anonymous

 ~*~
Shopping for a doll lover for the holidays? Better still, shopping for yourself? :-)


Peek at two of my reborn creations now on eBay. No reserve. Super quick, one day handling time. Economy or expedited shipping available.

Lily ~ Formerly, Kaylee, a Limited Edition sculpt by Linda K. Smith

Lily is 19 inches long and weighs approximately 3 pounds.


~*~

Keri ~ Formerly Taffy, a Victoria Reid sculpt

Keri is 17 inches long and weighs approximately 2 pounds.
~*~

If you have any questions about my dolls, please feel free to leave a comment.
Bright Blessings!

"Mary Golightly"
(Trenda Plunkett


Taffy and Kaylee from Secrist Dolls


Saturday, October 1, 2011

Meet Lilly


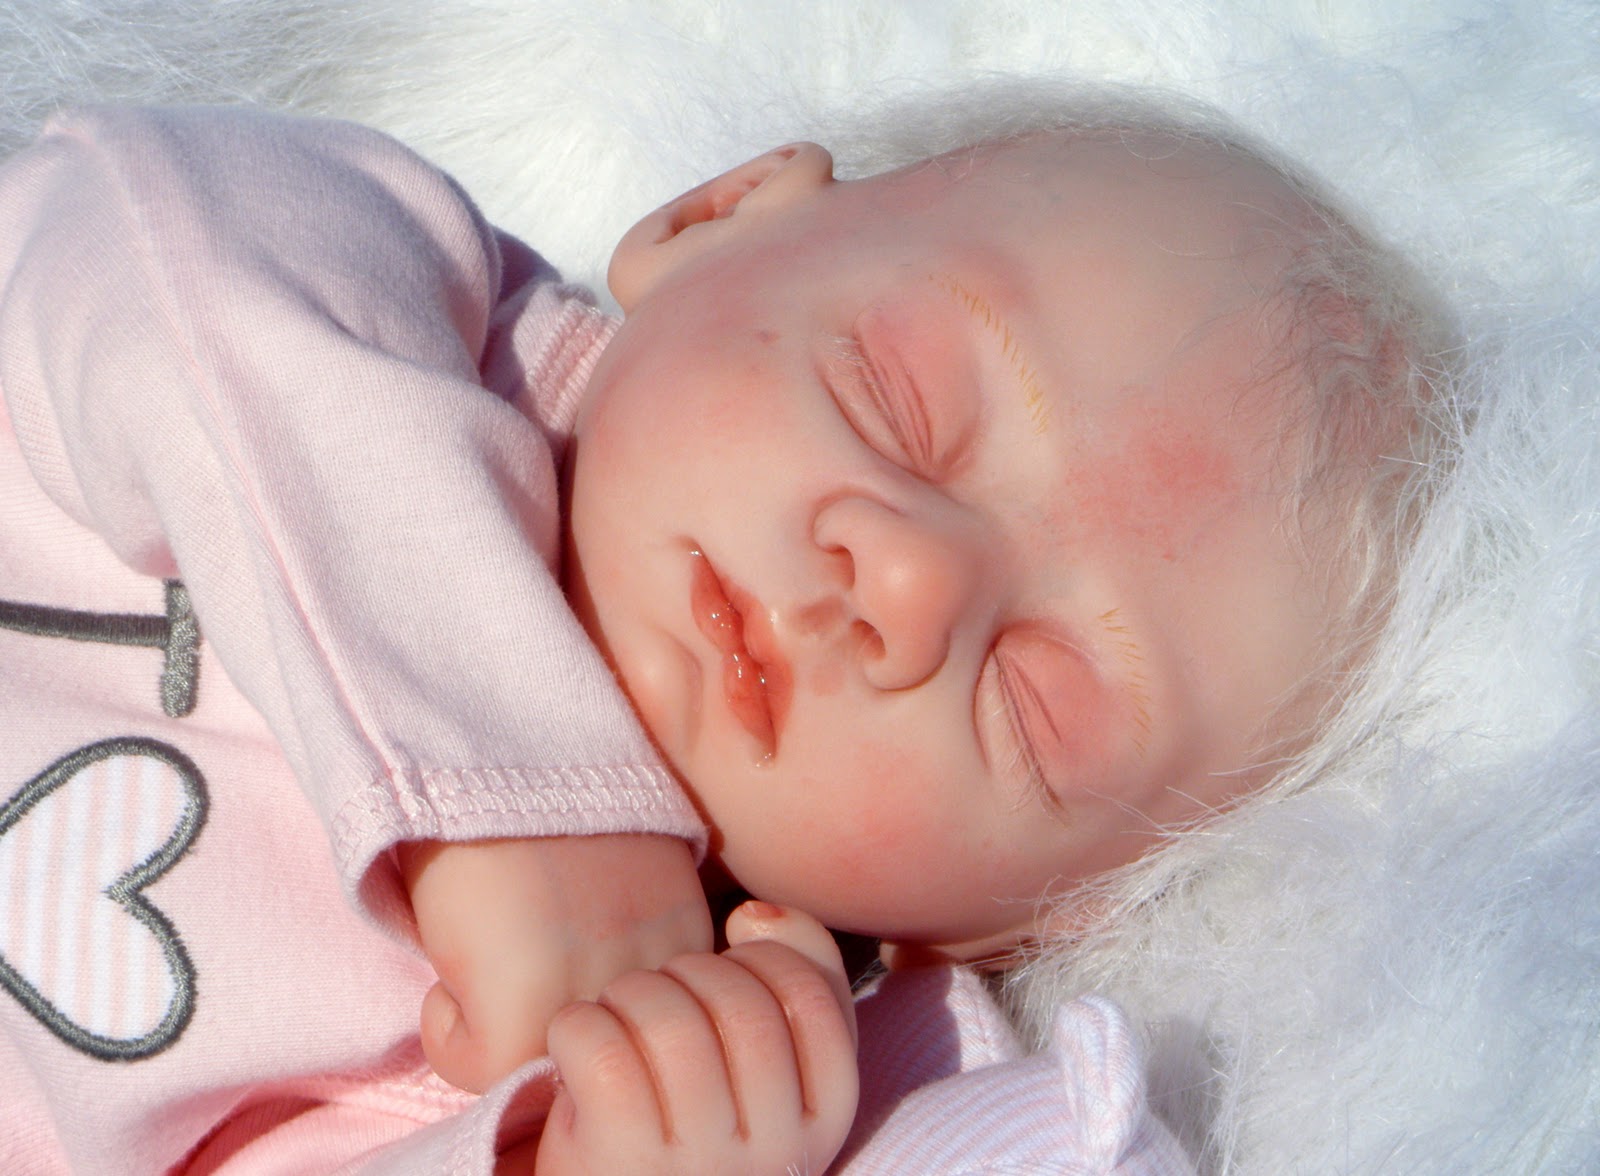
Thank you to everyone who's been following along as I brought Kaylee to life! Kaylee is the name of the sculpt by Linda K. Smith. Secrist Dolls produced a limited edition of Kaylee doll kits...only 295! I have completed my doll and have now renamed her Lilly.


Love her sweet blond hair? I wanted Lilly to resemble a toddler, so rather than rooting her hair, I selected a premium mohair wig (Kemper - Cassidy) from HunnyBuns Reborn Supply. (not an affiliate link)


If you look closely, you'll notice I added a few finishing touches to Lilly. Her freckles were applied with a 00 round brush and a mix of Genesis Yellow Ochre and Burnt Umber. Her lips were given a wet appearance by applying Aleene's Paper Glaze (sometimes called Secrist Baby Tears) to her mouth and tongue. (Never bake Baby Tears.) I also applied her eyelashes with Aleene's Clear Tacky Glue.


Let me know in the comments what you think of Lilly! I hope you enjoyed seeing her come to life.


Bring Lilly home!


All photos copyright Mary Golightly (Trenda Plunkett). Do not copy without my express permission. Thank you!

Adorable stuffed bear is "Fuzz" by Ty Beanie Buddies.

Bringing Your Baby Doll to Life - Part 7

Welcome back!

Here's a picture of Kaylee's eyebrows. As you can see, I used a very fine liner brush to apply the color.

I'm planning to use premium blonde mohair for Kaylee's hair, so I wanted her eyebrows to be blonde, too. I used Genesis Yellow Ochre with a touch of Genesis Burnt Umber. For extra control, I like to use Genesis Thinning Medium instead of odorless thinner.

Paint the eyebrows using your choice of Genesis heat set paints and Genesis Thinning Medium.

Bake the head at 265 degrees Fahrenheit or 130 degrees Celsius. Allow it to cool completely before continuing.


P.S. I'm not sure if you can see it in the picture, but before I did the eyebrows, I added some details to the eyelids. They are very subtle. I painted red micro veins on Kaylee's lids with my fine liner brush. After baking the veins, I applied a very thin layer of blue to tint the lids. I baked the head again before applying a bit of thin purple tint to the lids.

~*~

If you are interested in an in depth look at color mixing and reborning, I highly recommend The Art of Reborning II - Painting with Genesis Heat Set Paints. (not an affiliate link)

Bring home one of my precious angels! See Baby Keri's Auction and My Babies on Etsy

Bringing Your Baby Doll to Life - Part 6

Welcome back! Today, I'm sharing pictures of how I painted Kaylee's lips and nails.

Mix your lip and nail paint using Genesis Heat Set Paints in Phthalo Red 02, Phthalo Red 06 and a very small amount of Phthalo Green 06. Mix these colors with a small amount of Genesis Thinning Medium for extra control when painting the lips and nails.

Using Genesis Thinning Medium instead of Odorless Thinner for the lips and nails provides added control as you paint. Don't use more 40% of the thinning medium to the paint.

Apply this color with a small filbert brush. Apply to the lips and nails and tips of fingers and toes.

Apply the with a small filbert brush.

Bake the parts for 265 degrees Fahrenheit or 130 degrees Celsius. Allow the parts to cool completely before continuing to the next step.

If you want, you can apply a bit of the crease and wrinkle paint to the center of the mouth. If you do, be sure to bake the head again. Since Kaylee has such a cute open  mouth, I decided to create a textured tongue. Do this by applying tiny dots of Flesh 08 (no thinner or thinning medium) to the tongue with your 00 round brush. Bake. Allow to cool. Now add another thin layer of lip paint over the dots to soften them. Bake. Allow to cool. For added texture, I like to "dot on" Authentic Reborn 3D Texture Medium with a pointed clay shaper tool. Bake. Allow to cool.

This is how the mouth will look after applying texture and color as described above.

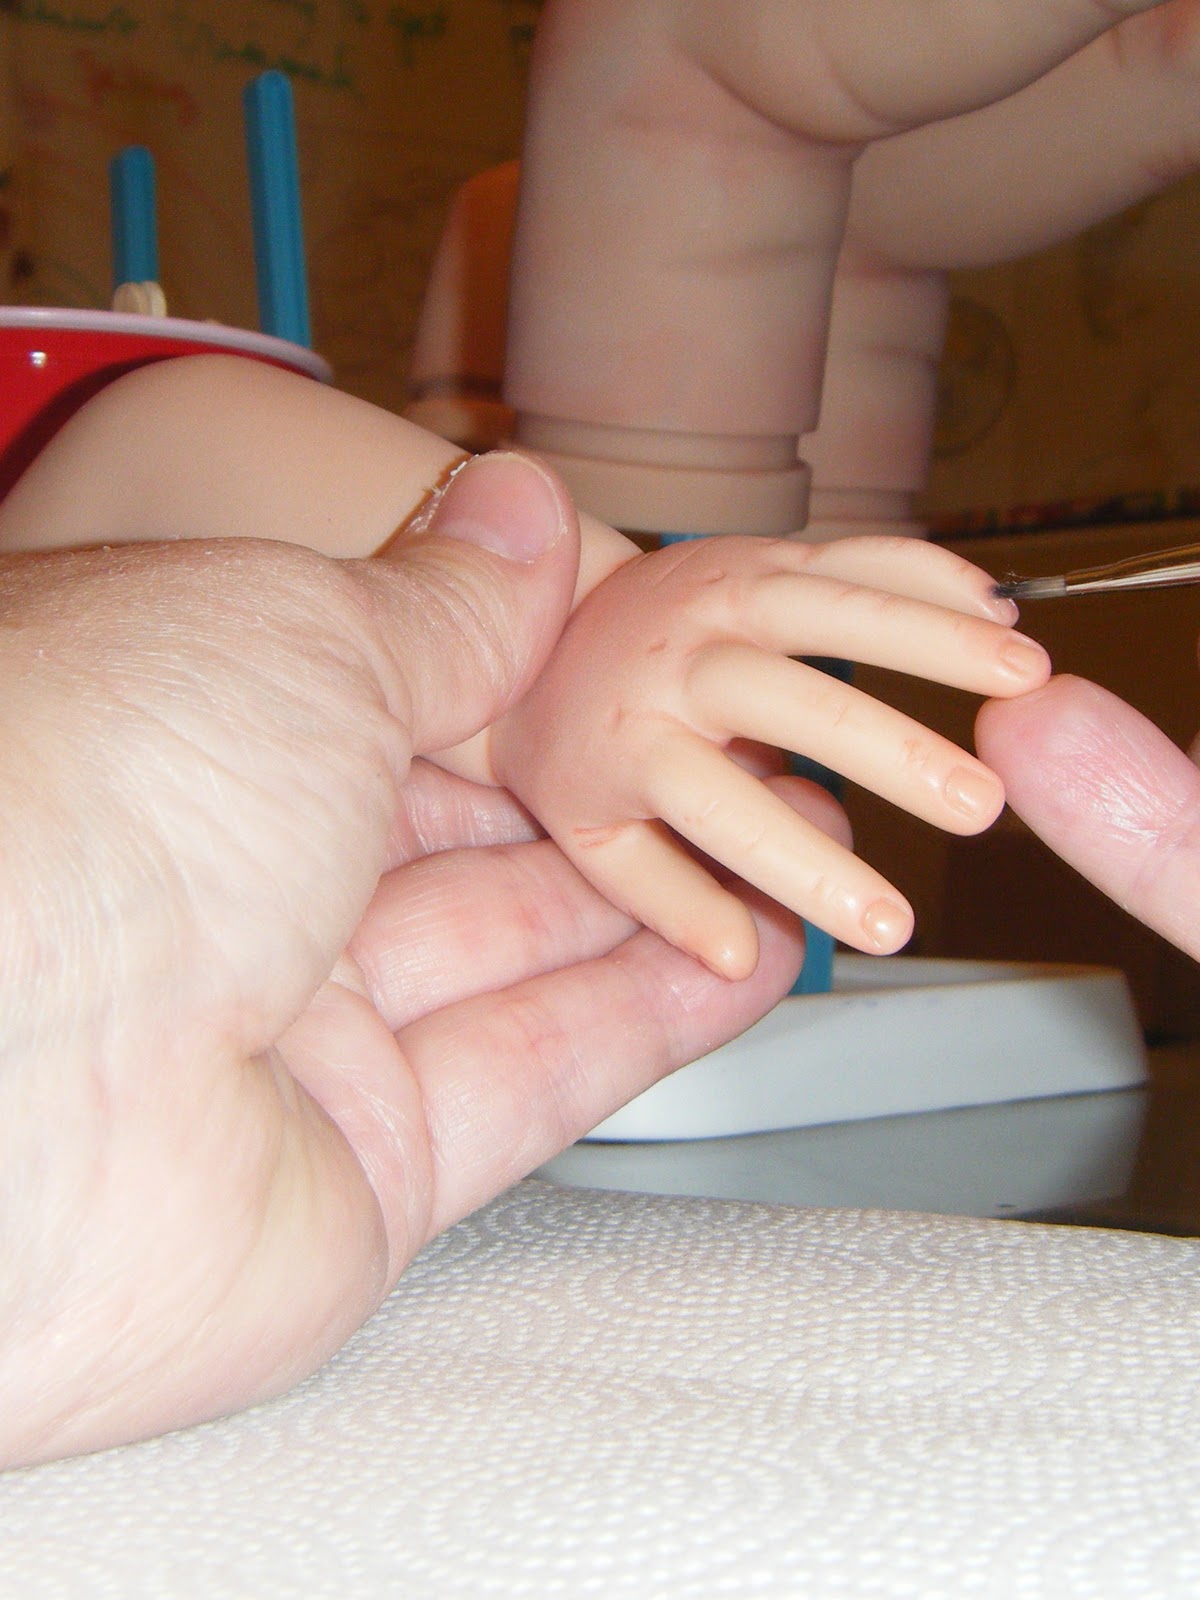
With a clean small filbert brush, apply a thin layer of Genesis Glazing Medium to the fingernails and toenails.

With a 00 round brush, apply Genesis Flesh 08 to the nail tips for a "baby manicure."
Once you've applied the Genesis Glazing Gel and Flesh 08 to the nails, bake the limbs at 265 degrees Fahrenheit or 130 degrees Celsius. Allow parts to cool completely before continuing to the next step.

~*~

If you are interested in an in depth look at color mixing and reborning, I highly recommend The Art of Reborning II - Painting with Genesis Heat Set Paints. (not an affiliate link)

Bring home one of my precious angels! See Baby Keri's Auction and My Babies on Etsy

Friday, September 30, 2011

Bringing Your Baby Doll to Life - Part 5

Welcome back! Today, I'm sharing pictures of how I painted Kaylee's creases and wrinkles.

Mix your crease and wrinkle paint in one of the wells on your porcelain (or aluminum...no plastic!) palette. I'm using Genesis Heat Set Paints. Darken your blush color mix with some of your Burnt Umber. This will deepen the tone of your paint. Stephanie Sullivan suggests adding a bit of Dioxazine Purple 04 to cool the color.

Mix your crease and wrinkle color on your palette.

I use my 00 round brush to apply this color to the creases and wrinkles. Use a scrubby brush to feather and blend the edges.

Apply crease and wrinkle paint to the inside of the nostrils.

Apply crease and wrinkle paint to the inside of the ears.

Use a scrubby brush to feather the edges of the crease and wrinkle paint.


Apply paint to the creases and wrinkles on the hands and arms.

Apply paint to the creases and wrinkles on the feet and legs.
Bake at 265 degrees Fahrenheit or 130 degrees Celsius. Allow the parts to cool completely before proceeding to the next step.

If you are interested in an in depth look at color mixing and reborning, I highly recommend The Art of Reborning II - Painting with Genesis Heat Set Paints. (not an affiliate link)

Bring home one of my precious angels! See Baby Keri's Auction and My Babies on Etsy

Thursday, September 29, 2011

Bringing Your Baby Doll to Life - Part 4

Welcome back! Today I'm sharing more pictures of Kaylee, my current baby doll in progress. I apologize for the photo quality. I am saving up for a good camera. I hope you still find the posts and photos to be helpful.

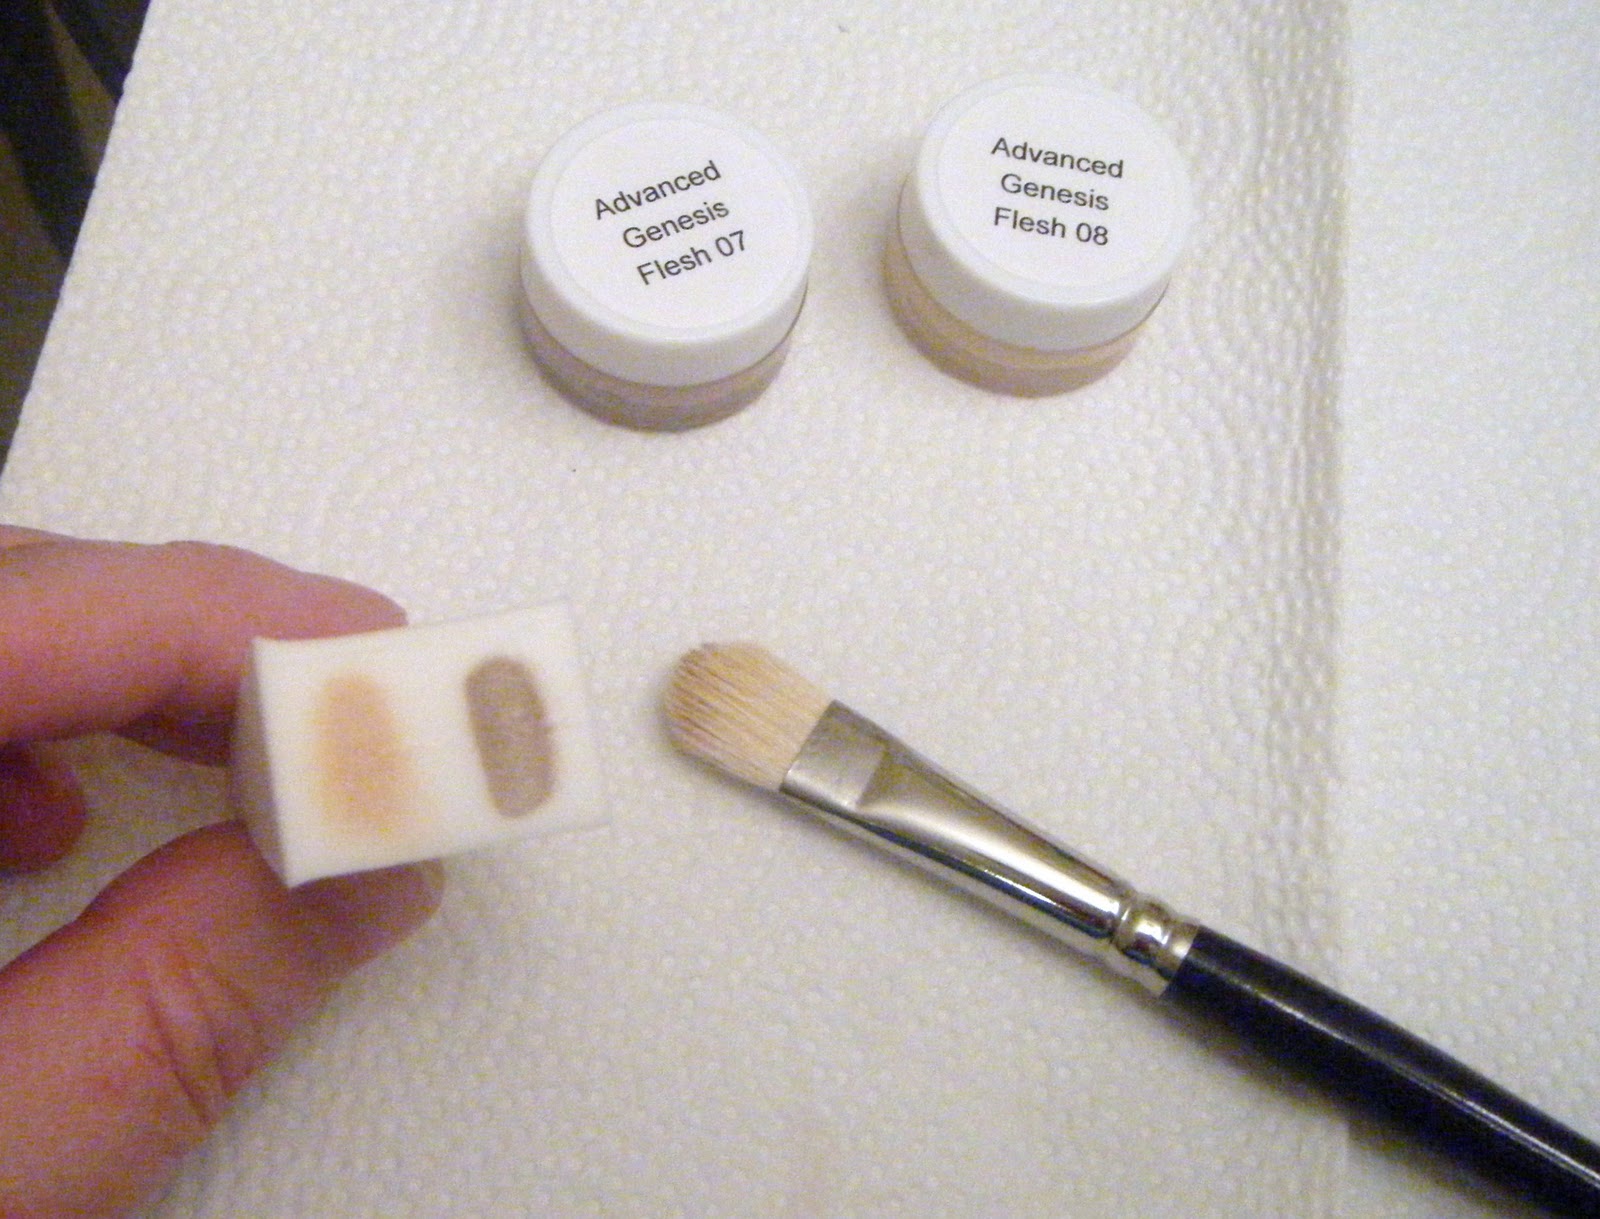
After baking the first blush layer, let the parts cool completely. For the next step, we'll be adding the second layer of foundation paint. Lightly moisten the end of your cosmetic foam wedge with odorless thinner (I use the Mona Lisa brand). With a 1/2 inch Maxine's Mop, apply a dot of Flesh 07 and a dot of Flesh 08 to the sponge.

Genesis Flesh 08 (left) and Flesh 07 (right)

With an up and down pouncing motion, apply the paint to the doll, reloading the sponge when needed. Try not to over-blend the colors.

Apply the second foundation layer using Flesh 07 and Flesh 08.  

Bake the parts at 265 degrees Fahrenheit or 130 degrees Celsius. Allow parts to cool completely before continuing.

Next, we use our blush color mix to apply blushing details to the head and limbs. Look at pictures of real babies to get ideas for blushing your baby doll in a realistic way.

Add blushing details to the head with your Maxine's Mop.

Add blushing details to the limbs with your Maxine's Mop.

Bake the parts at 265 degrees Fahrenheit or 130 degrees Celsius. Allow the parts to cool completely before continuing.

~*~

If you are interested in an in depth look at color mixing and reborning, I highly recommend The Art of Reborning II - Painting with Genesis Heat Set Paints. (not an affiliate link)

Bring home one of my precious angels! See Baby Keri's Auction and My Babies on Etsy

Sunday, September 25, 2011

Bringing Your Baby Doll to Life - Part 2

Our next step in bringing Kaylee to beautiful reborn life is applying the first foundation layer of paint. I use Genesis Flesh 08 mixed with odorless thinner.

Mix Genesis Flesh 08 with odorless thinner (I use Mona Lisa brand.)

Apply the thinned paint to the end of a clean cosmetic foam wedge sponge.


Using a 1/2 inch Maxine's Mop, I apply the thinned Flesh 08 to the end of a clean cosmetic foam wedge. With an up and down pouncing motion, I then apply the paint all over the head. Keep pouncing and adding more paint to the sponge until you have a nice even coat.

Apply the foundation layer in an even coat. Use an up and down pouncing motion.

This layer forms the foundation for all of the other layers of color I'll be adding along the way. Repeat this process for the arms and legs. I don't apply this coat to the lips or nails.

Set the parts on the drying rack to allow the odorless thinner to evaporate before baking the parts.

Set the parts on the drying rack. Wait until all of the odorless thinner has evaporated before placing the parts in your oven. I prefer to use a dedicated counter-top oven (not a toaster oven). Remember to use an oven thermometer to ensure the temperature is exactly 265 degrees Fahrenheit or 130 degrees Celsius. Set a timer for 8 minutes.

Once the parts are baked, allow them to cool before proceeding to the next step.

Always keep paints, thinner, and other supplies out of the reach of children and pets. When using a counter-top oven, position it where children and pets cannot touch it.

Up Next: Applying the first blushing layer

Bring home one of my precious angels! See Baby Keri's Auction and My Babies on Etsy.


Wednesday, September 21, 2011

Meet Keri ~ Precious Preemie


Meet Keri, a sweet little preemie reborn baby girl. Keri measures 17 inches in length and weighs approximately 2 pounds. She was weighted using fine glass weighting beads and high quality Poly-fil.

Her complexion is a beautiful peaches and cream. She has a tiny birthmark beneath her eye and another beneath her nose. So cute!

Keri began life as a Taffy sculpt from Secrist Dolls. Her hair and eyelashes were hand-rooted with blond Angelic Touch Mohair...so baby soft!

As you can imagine, many, many hours of loving work went into the creation of this little darling.

Want to bring this little darling home to stay? See Keri's eBay auction before she's gone!